LOCATE DISTRESS BEACON
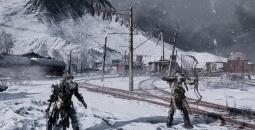
Drop down to the previously located distress beacon from the helicopter in the relay outpost (Picture 1). With nothing more to see apart from the numerous pools of blood, continue your search.

Image 1
SEARCH LOCAL STRUCTURES
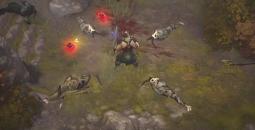
Follow your teammates along the path and then quietly enter the house. A heat source is then detected! These are just survivors in hiding (Image 2). After they have taken refuge again, cross the bridge leading to a building where two of your soldiers are lying (Picture 3)...

Image 2

Image 3
Once in the courtyard, enter the structure that follows (Image 4). That's when you come under enemy fire from outside.

Image 4
OFFENSIVES ON ENEMY ARMIES
First shoot through the window (Image 5) serving as cover. When the area is a little calmer, go down the few steps on your right to finish it.

Image 5
A transporter drops off a horde of enemies. Annihilate them all by following the path (Picture 6). Do not hesitate to cross the river (Image 7). Despite your armor, you won't sink in knee-deep water! After a while, you join your helicopter but you only have the right to continue on foot.

Image 6

Image 7
RECON VALLEY EAST
Now move north (Picture 8). A vehicle is waiting for you after a few steps, but if you want to get the Always Them Fastest Achievement, don't drive it. Note that you can let Carter do this for you while you rest in passenger mode.

Image 8
After a while, you pick up a small activity in the camp to the east at an intersection (Picture 9). Go take a look. Enter the room immediately to the right (Image 10) in order to discover a data terminal at the feet of a corpse (Image 11).

Image 9

Image 10

Image 11
Once the area is cleared, go back slightly to take the other passage. After passing the broken iron bridge, enter the camp on your left (Picture 12). The team then receives a distress message. It is your duty to rescue the struggling squad.

Image 12
LOCATE MISSING SQUAD
The "Transport ship" objective is displayed in red on the screen with the distance remaining to be covered. So join him (Picture 13) while eliminating the threat.

Image 13
DEFEND EVACUATION ZONE
Once the squad is saved, wait for help to arrive. But it won't be that simple! You will have to defend your position by shooting all the way at the attackers. Finally enter the helicopter (Picture 14).

Image 14
RELAY OUTPOST
Arrived at your destination, fight the many covenants as your teammate Kat tries to access the main door. After valiantly fighting, fall back inside the outpost. The door will then close: you are calm!
Activate night vision during progression. Inspect the corpse in the middle of the passage (Picture 15). While trying to get a survivor out of her hiding place, some covenants attack you and then retreat (Picture 16). Follow them and clear the area.

Image 15

Image 16
The fight ends at the level of the moving columns. All that remains is to reset the link in the next room (Image 17). Carter then makes an inventory of fixtures to his hierarchical superior.

Image 17
Written by Mugi on 27/09/20101.1. - Mission 1 - Noble Control1.3. - Mission 3- ONI: Base Sword


